25years experience house refurbishment25 years experience
restoration house refurbishmentRestoration Experts
award winning house refurbishmentAward Winning
basement specialists house refurbishmentBasement Specialists
25 years experience
Restoration Experts
Award Winning
Basement Specialists

Restorations

20 things you can do without planning permission

December 27, 2018

As builders, we are often confronted with the trials of obtaining planning permission, especially if you are in a conservation area. But you might be surprised to know that there are plenty of renovation projects that DON’T need planning permission. We found this comprehensive list on the HomeBuilding & Renovating site.

Do bear in mind, however, that there are several caveats and conditions your plans have to meet in order to avoid the planning permission process, so play close attention to the conditions. Better still, involve an experienced architect to find out exactly what you need to do.

Did you know that not all home improvement projects require planning permission? Here are 20 things you can do under Permitted Development.

When it comes to large and substantial home improvement projects it is more than likely that you will need planning permission from your local authority before starting the work. But there are a number of smaller, (effectively pre-approved) improvements that you can make under what is know as your Permitted Development Rights.

What is Permitted Development?

Permitted Development (PD) Rights give implied planning consent for a number of smaller home improvements (we’ve listed 20 of them below). While there are many projects you can undertake within PD, there are limitations (especially if you have already made many improvements to your home, or if you live in a designated area or a listed building).

1. Interior Remodel

Remodelling the interior is a great way to add more space to your home and can often be done within PD, especially if your proposed work does not require you to extend the overall footprint of the dwelling.

While you won’t need planning permission, you will need Building Regulations approval on structural elements and electrical works.

2. Moving or Adding Windows & Doors

In normal circumstances, you can replace or add new windows in the original walls of your house without needing to secure planning approval. (However, you may need planning permission if conditions were attached to the original permission). As long as your building isn’t listed, you should be able to install double glazing under PD, but do remember that for new or bigger windows or doors, you will need to follow Building Regulations guidance.

Bear in mind that bay windows are classed as extensions. Planning permission to insert a new window or door opening is not required as long as any upper floor windows on the side elevation are glazed with obscured glass (level 4 or 5 obscurity). They must also be fixed into a non-opening frame (unless the opener is more than 1.7m above the floor of the room in which the window is installed).

3. Converting Attached Buildings, e.g. Garages

Converting an attached building, like an integral garage, into living space also falls under PD as you are not increasing the overall footprint of the building.

4. Adding a Single-Storey Extension

As long as you stay within the below parameters, you can build a single-storey extension without needing planning permission:

  • The extension does not sit forward of the principal elevation
  • Materials should be similar
  • Where it is within 2m of any boundary, the eaves cannot be higher than 3m, and no more than 4m in height otherwise
  • Rear extensions — no more than 4m in depth (detached house) or 3m in depth (semi-detached or terrace)
  • Side extensions — the width of the extension must not be greater than half the width of the original dwelling. Side extensions are not permitted on Article 1(5) Land (e.g. AONB, Conservation Areas).

5. Adding Rooflights

Under PD you can make alterations to the roof of a dwelling, like the introduction of rooflights (as long as they do not project more than 15cm from the roof slope). If, however, the rooflights would extend forward of the roof plane on the elevation fronting a highway then they are not permitted under PD.

It is worth noting that rooflights are not permitted on a dwelling which is located in an Article 4 Direction Area. Two common examples are a Conservation Area or an Area of Outstanding Natural Beauty.

6. Converting a Loft

Additional space can also be achieved through a loft conversion, without the need for planning consent. While there are limitations on the cubic content allowed under PD, generally, up to 40m³ is fine.

When it comes to additional headroom in the loft space, PD allows for the construction of dormer windows. But, they must not sit higher than the highest part of the existing roof, or extend forward of the roof plane on the principal elevation.

7. Adding a Two-storey Extension

You can add a two storey extension to your home under PD providing it is at the rear of the dwelling (this includes adding a second storey onto an existing single storey part of the house). In addition, your two storey extension must not exceed 3m in depth or be within 7m of the rear boundary. Specific restrictions also apply to the glazed nature of windows in such extensions.

8. Adding a Conservatory or Orangery

Similar to single storey extensions, conservatories and orangeries fall under the same restrictions and can be added under PD. Check the rules about single storey extensions above.

9. Adding a Shed or Outbuilding

Where you have a larger plot, there may be opportunities to build multiple outbuildings under PD, providing the total area covered by such buildings/enclosures does not exceed 50% of the total area of the curtilage. This 50% should take into account any extensions, but not the area covered by the main house.

Outbuildings cannot sit forward of the principal elevation, and there are height restrictions depending on the type of roof (4m for dual pitch roofs, 3m for other roofs, and 2.5m when the building is within 2m of the boundary). Outbuildings may only be single storey, with the maximum eaves height remaining at 2.5m.

A key factor to bear in mind when considering what you want to achieve from an outbuilding is that the use should be ‘incidental’ to that of the dwelling, e.g. gym, garage, store. Outbuildings under PD cannot be used for residential accommodation, e.g. bedrooms, but can be used to provide a place to work from home.

10. Converting Two Homes into One

Converting a pair of semis or two flats, into one property can usually be done under PD and can be a great way of generating extra space without having to move. Unfortunately, the same rules do not apply if you are dividing a single property into two dwellings. For this you would need to apply for planning permission.

11. Adding a Porch

You can build a porch on the front of your property without planning permission, as long as you follow certain rules:

  • No part of the porch can be taller than 3m
  • It cannot be within 2m of any boundary adjacent to a highway
  • The ground area (measured externally) does not exceed 3m².

12. Adding Gates, Walls and Fences

Permitted Development facilitates the erection, construction, maintenance, improvement or alteration to a gate, fence, wall or other means of enclosure, providing such work stays within the following limitations:

  • The height would not exceed 1m when adjacent to a highway
  • The height would not exceed 2m for any other gate, fence etc
  • Such development is not permitted under PD around a listed building

13. Garden Decking

As long as the height falls below 300mm, garden decking and other similar structures can be built without planning permission, as long as certain criteria are met (available at planningportal.co.uk).

14. Building a Swimming Pool

Under Permitted Development rights you can build a swimming pool within your garden, provided that the total area covered by the pool does not exceed 50% of the area of the garden curtilage.

15. Creating New Access

Creating a new vehicular access onto an unclassified road can be done under your PD rights, but you will need planning permission to create accesses onto classified roads.

For a new access onto a classified road, you will need to ensure sufficient visibility when leaving the site, as well as enough turning space to allow you to enter and exit in a forward gear.

16. Changing/Adding Cladding

Cladding (stone, pebble dash, render, timber, etc.) changes may fall under PD, but is not permitted under PD on any dwelling house located on Article 1(5) land (in special areas, e.g. an AONB).

17. Adding Solar Panels

Solar panels can be added under PD, providing they do not protrude more than 200mm beyond the plane of the wall or roof, and that the highest part of the panel is not higher than the highest part of the roof (excluding the chimney).Free-standing panels can also be developed, but are limited in size and proximity to the boundary.

Limitations will apply in Conservation Areas and on listed buildings.

18. Adding a Basement

In a recent appeal decision, it was considered that basements could be PD under Class A of the General Permitted Development Order (GPDO). However, bear in mind that PD does not allow for engineering works.

19. Adding/Creating Parking Spaces

Class F of the GPDO refers to the provision of hard surfaces, such as parking areas. These are also permitted under PD providing that any hard surface situated between the principal elevation of a dwelling and the highway, or any surface which would exceed 5m², is made of porous materials, or provision is made to direct run-off water from the surface into a permeable/porous area within the property curtilage… not onto the highway!

20. Converting Industrial/Commercial Buildings

It is possible to convert an industrial, commercial or agricultural building for residential use, without the need for planning permission. As is often the case, you will require approval for Listed Buildings and in Conservation Areas. You will also need to follow the Prior Notification procedure if you are converting an agricultural building such as a barn.

Read More

London Basement Conversions – What can go wrong?
December 18, 2018

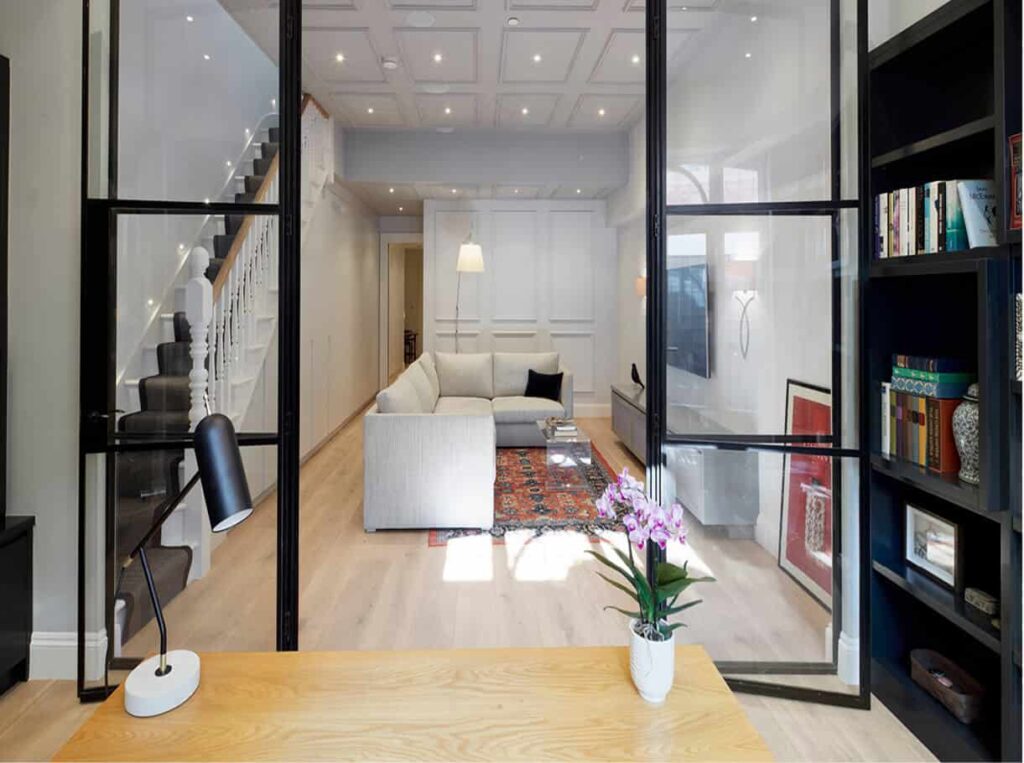
We’ve talked endlessly about London basement conversions… that’s only because we love converting basements, our customers value our experience and knowledge about basement building…and if we say so ourselves, we are very good at it. The basements we have built have ultimately put a smile on our customer’s faces; it’s that space they have envisioned that adds the ‘wow’ to their home, whether it’s a space of calm or a space to entertain. That doesn’t mean however, that the process of building these basements have been completely smooth-sailing. We have experienced several challenges in some of the conversions we’ve built. The key, of course, is to overcome these challenges by finding workable solutions.

If you are thinking about converting your basement, be aware of some of these potential roadblocks along the way, but do remember there is always a solution to every problem.

  1. Planning permission

Excavating a basement is a major structural undertaking and will require planning permission via your local council. Make sure you appoint an experienced architect who understands your local council’s requirements. Plans that are not detailed and do not abide by council regulations are likely to get rejected. If you are in a conservation area, you will need to take additional rules and conditions into considerations. In most councils, the consultation is 8 weeks from the time of submission of the plans. Any changes will cause the 8-week period to re-start. It’s important to get it right the first time.

Having said that, in Kensington and Chelsea there have been over 800 planning applications for basements submitted in the last 5 years. Only 10% are rejected and these are almost always resubmitted. So, the odds are in your favour.

  1. Love thy neighbour

You will probably have to enter into a party wall agreement with your neighbour. We suggest you involve your neighbour in your plans to get them on side before you put your planning application in. If they object after the plans are in, you might have to amend your plans and restart the 8-week consultation period, further delaying your project.

  1. Risk of groundwater

The impact of groundwater driven by both the general water table and often hidden underground streams can throw a spanner in your works. Encountering water adds to the complexity as excavating wet clay takes longer, can clog up conveyor belts and requires continuous pumping.

  1. Diggability

It’s also more difficult to install basements where there is a solid floor. There are some cases where it really is not feasible to fit a basement. In fact, many modern terraces and townhouses that are built on raft foundations can’t be underpinned, so can’t have basements. It’s also important to have good access for the excavation work: too close to a boundary or the road and it could be difficult for a JCB to get in.

  1. Waterproofing or tanking

We believe this is one of the most important aspects of basement building. Poor waterproofing techniques resulting in leaks and floods can destroy all the hard work in converting a basement into a beautiful living space. Problems associated with this are:

  • Failure to properly seal service penetrations in basement walls.
  • Poor backfilling which can lead to punctures in tanking.

One of the solutions to this problem is to install a cavity membrane system.

SDA Build London is proudly accredited by the UK’s leading waterproofing brand, Delta, with all our basement conversion projects installing their cutting-edge Delta Membrane Systems. This high-density polyethylene covering is applied to the walls, floors and ceilings of a basement dig out, where it blocks, controls and drains any potential ground water ingress from entering a property. It can be applied to new, existing and retrofit projects, and is flexible and durable so it can cope with movement or vibration in the home – important as this is often the cause of basement flooding! All our Delta Membrane installations come with a 30-year warranty that ensures your basement is protected.

If you are considering building a basement, give us a call. We’ll be happy to visit your property, discuss your ideas and share our thoughts on the feasibility of a basement on your property, any potential pitfalls and how we can overcome them.

Call us on 0208 191 7595, email us at enquiries@sdabuildlondon.co.uk or book a Free Refurbishment Consultation via our website. We’d love to hear from you.

Read More

Sash Windows? They need some TLC…

December 4, 2018

We’ve used sash windows for some of the period homes we’ve worked on and not only do they look stunning and add character, but they give the home a sense of expanse and space.

We found this useful article in Houzz, on everything about Sash Windows…

Sash windows are the beating heart of any period home. They come in a range of styles and configurations and when they go wrong, they demand an eye for detail and an expert hand. From upgrading cords to fitting new sections, here’s what to consider if you need to restore yours.

Identify your sash window design
The two main styles of sash are Georgian and Victorian. Georgian windows have glazing bars and multiple panes of glass within the sashes. Victorian versions have one or two big panes in each moving sash. Later, Edwardian designs featured a mix of the two.

Sash windows can be singular, or form part of a bay. Unlike casement (with hinges) and hopper (tilting) windows, sashes have the advantage of remaining flush to the wall when open and do not impede blinds and shutters.

Compare your windows to others in your road and neighbourhood. Styles can change across areas, with variations in sills, sash horns, glazing and moulding profiles. This will help you assess if your windows are likely to be original (or based on original designs) and will inform any decisions around possible repairs and refurbishment.

Understand how sashes work
Sash windows comprise an outer frame or box, and usually a pair of vertical sliders or ‘sashes’. However, they can be fixed so neither of the sashes moves, or single hung, where only one of the sashes moves, usually the bottom one.

Traditional sash windows operate using a pulley and counterweight system. Cords are connected to weights that sit inside the frame and counterbalance the movement of the sashes, holding them in place when they’re pushed up or down.

Be aware of what can go wrong…
Sash cords can break over time, resulting in the weights being lost in the sash box. If there are gaps around the sashes, the windows can rattle, let in draughts and leak. Poor redecoration is also a factor and can cause windows to stick.

General neglect and poor maintenance causes the wood to decay and rot, but thankfully timber is, for the most part, repairable.

…and what’s involved in fixing it
Replacing the cords and weights inside the box frame is one of the more straightforward and least costly repairs associated with sash windows.

“More extensive repairs often require sectional replacement,” Adrian Thompson says. “This can include renewing the lower sill, replacing sash frames or renovating the existing box frame.”

“The timber windowsill gets the brunt of the weather, so can often require a lot of renovation work,” Chris Herrington agrees. “The rot seeps up the window from the sill, causing the decay – and sometimes a completely new sill and lower box assembly is needed.”

For any sectional replacement work like this, the window is taken apart, any rotten timbers are routed out to get back to the sound wood, and new timbers are spliced in. Once the work is done, the window is re-hung and balanced so it works smoothly.

Find a reliable tradesperson
“Period properties require exceptional attention to detail, as windows were not made to a standard specification,” Richard Dollar says. “Make sure the company you choose has experience of working on similar properties. Are they members of any accredited bodies?”

Windows are an important element of your home and can involve significant expense. “Ask your supplier for written referrals, visit their workshop and check their credentials,” Adrian says. “If the suppliers are based miles away, how will they service any guarantee work?”

Get three or four quotes for any work, Chris advises, “but make sure you’re comparing like with like when assessing price differences. And ask for references from your chosen supplier. They should have previous customers who are happy to share their experience with you.”

Fit draught-proofing
Draught-proofing is important because of the way sash windows are designed. “Gaps around the sashes mean they can rattle and let in draughts, rain and dust,” Chris says. “Installing a draught-proofing system in the gaps solves these problems.”

Another option is timber secondary glazing, Richard says. “This involves fitting an additional glazed screen on the inside in front of a sash window. It can improve thermal efficiency and reduce noise, and is often a popular choice in listed buildings, where double glazing is unlikely to be approved.”

Shutters and window treatments can also contribute to energy efficiency, Adrian says. “Fully closed plantation shutters and interlined curtains can make a big difference in winter.”

Consider the costs
Costs will vary enormously depending on the condition and size of your windows, and the complexity of the work and materials involved. For the straightforward replacement of cords, weights and locks, expect to pay from around £300 to £450 per window.

Renovation and upgrades, including draught-proofing, double glazing and/or fitting new sashes into existing frames can cost anything upwards of £1,000 to £1,500 per window.

For renewals involving a full back-to-brick replacement being supplied and fitted, costs are likely to start at around £2,300 per window.

Decide if it’s better to repair or replace
As well as cost, condition will be a key factor in whether you choose to repair or replace a sash window.

“We like to think we can save a window that looks beyond repair,” Chris says, “but it depends on customer preference and budget. Original timber is far better quality than the wood we get today, so with a little bit of care and attention, plus some ongoing maintenance, timber windows can last another 100 years.”

If the frame is still in good condition, you may be able to just replace the moving parts, Richard says. “One advantage of timber windows is that they can often be repaired if issues are dealt with promptly.”

“There’s no golden rule around repair versus replacement,” Adrian adds. “The important thing is to ensure any work is faithful in style, appearance and operation to the original, and maintains the integrity of the building.”

Gen up on conservation area rules
If your home is listed or you live in a conservation area, speak to your local planning office about any work you want to carry out on sash windows.

“In listed buildings, it’s always preferable to renovate rather than replace,” Chris says. “However, we are seeing more cases of slim double glazing being authorised for installation in listed homes.”

Draught-proofing or changing the sash cords and weights will not require Planning Permission, Richard says, “but more major repair work, such as re-glazing or installing new sashes into existing frames, may.” If you’re unsure, speak to your local council.

“Consent should be sought for double glazing and renewal,” Adrian says, “but works in conservation areas should not be an issue, as long as homeowners stick with timber, and the windows end up with the same appearance and design as the originals.”

Keep up with regular maintenance
Once any repair or restoration work is done, it’s important to check timber and paintwork frequently.

“We recommend painting or varnishing external timber sills annually to make sure they’re weather-tight,” Chris says.

Open sash windows often to prevent them from sticking, Richard advises. “Check any handles, trickle vents and working parts every year and lubricate them with silicone spray or light oil. The timber framework of windows should be cleaned thoroughly every year, too, including the working parts.”

For 10- to 12-year repainting cycles, Adrian recommends modern microporous paint. “Then, other than cleaning traffic film off the paintwork and occasionally oiling the pulley and locks, sash windows will be relatively maintenance-free,” he says.

Read More
Rendering

Su-“render” your home to give it an uplift

November 20, 2018

5 Reasons You Should Consider Rendering Your Home’s Exterior

(We found this interesting piece in Homebuilding and Renovating… Could be useful weighing up the pros and cons of rendering your property)

If your property needs a bit of a facelift, it’s worth considering how render might give your home a new lease of life

The SDA Build London team are specialists in all aspects of property renovation. Give us a call on 0208 191 7595 to discuss your needs. Email us on enquiries@sdabuildlondon.co.uk or better still book a FREE consultation so we can pop around to your property and give you some of our suggestions.

Read More

Matching materials for an extension from Homebuilding and Renovation
October 16, 2018

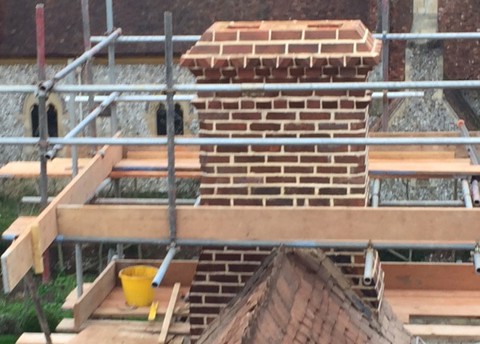
If you are considering an extension think about matching the roof tiles, bricks and stone to your original build. It may be that you want a modern extension to complement your existing structure, but if you want a seamless look, matching these aspects to your original structure may need some planning.

We found this useful article in Homebuilding and Renovation on what you need to consider if you want to match the roof tiles, bricks and stones to your original structure.

Nothing ruins a house more than a badly matched extension, but with a little research, your new space can look as though it has been there forever. There are several cardinal sins when it comes to extension design, but within this article the focus is on how to source, alter and use materials in order to get your extension to blend seamlessly with what is already there.

Your main focus when striving for a matching extension should be the materials you use for its construction – namely the bricks and roof covering – but do not overlook the details that hold them together.

Matching Bricks

Matching the new bricks to the old is where it all too often goes horribly wrong for many extenders.

There are several factors to consider when choosing a brick to match your existing:

  • Colour
  • Size
  • Texture
  • Bond

To find a match, you have a couple of options.

Reclaimed Bricks

Salvage yards too usually have a huge stock of bricks and will be happy to provide samples. On the plus side, you might be able to source an exact match, they will have aged naturally, and will carry with them plenty of character — plus they can be sourced in imperial sizes to match the period originals.

There is the sustainable aspect of using reclaimed materials to bear in mind too, as they have minimal impact on the environment. It is also an easy way to keep the planners happy in cases where the use of sensitive materials has been specified.

If you opt for reclaimed bricks, be sure to buy from a reputable source and check the batch you are buying thoroughly. Also, make a note of the lot number you ordered before delivery, as it is not unknown for the wrong bricks to be delivered, leaving you with bricks that are a close but not exact match. Wastage with reclaims can also be an issue. In some cases up to 30 per cent are unusable, whereas there is little or no wastage with new bricks.

New Bricks

If reclaimed is not for you, then you can still get an exact match as many manufacturers offer bespoke brick matching. Most brick matching services are free and rely on a picture or sample of the old brick, giving you either exact matches or a good alternative. If it is the sustainable aspect that is important to you, consider that the majority of newly made bricks have an expected life of at least 150 years, meaning that walls built with new bricks get an A+ rating by BRE.

Then there is the quality of the reclaimed bricks. “It is unlikely that reclaimed bricks have been tested under the European Standard BS EN 771-1 for resistance against frost attack or likelihood to effloresce (when soluble salts appear on the surface,” explains Mark Laksevics of York Handmade Brick, and this could adversely affect NHBC and house insurance.

“There have been reports of reclaimed bricks carrying dormant dry rot spores which become active when the brick is put to use.” There is also the matter of supply. Reclaimed bricks are often only available in limited numbers, unlike new bricks, and therefore making it difficult to find a match for any further extension work.

Cost

Good quality, machine-made, standard-size bricks: around £350 per 1,000 for good-quality, machine-made, standard-size bricks.

Handmade and reclaimed bricks: around the £700–£800/1,000 mark.
“Prices go up for specialised 2” (50mm) handmades — around 90p per brick for purpose made and well over £1 per brick for reclaims, as sourcing these can be difficult,” advises Mark Laksevics.

Brick Tinting

Brick tinting is a useful way of matching new bricks to old, blending in a bad extension or to make new brick repairs less noticeable. Brick tinting does not mean that the bricks are painted. It is a process that uses a chemical and oxide solution, using various colour dyes that have been chosen for the individual situation.

The solution changes the original colour of the brick rather than just coating it, which means that the brick will weather naturally and that the new colour cannot fade. Some companies, such as Extension Match, offer a lifetime guarantee on the service.

Matching Mortar

If you have spent the time and extra effort getting an exact match for your bricks, do not go and ruin it all with the wrong mortar. It is amazing how wrong new and different mortars can look sitting next to old mortar.

If the existing mortar is crumbling or in need of replacement, then you will in some ways find yourself in an easier position as the whole thing can be repointed using the new mortar. If, on the other hand, the mortar in the existing part of the building is sound, it can seem a bit of a waste of time to take it all out and repoint just for the sake of matching the new.

Some mortar specialists will match your original if you send them a sample, whilst others can carry out a complete chemical testing process to find out exactly what the existing mortar is made up of to ensure an exact match — although this will cost you around £200.

If the original section of your home uses lime mortar, then you would be sensible to ensure the extension does too. If not, then ensure you look at plenty of samples of what your new mortar will look like once dry in order to get a good match. And, if you are still not happy once the work has been carried out, the same companies who offer brick tinting services often also offer mortar tinting.

Matching the Roof tiles

As with brick, replica rooftiles can also be made to order and reclaimed tiles are widely available, although some roofers refuse to lay them, claiming it’s a time consuming job where hairline cracks that were previously invisible can cause a lot of wastage and slipped tiles later down the line. You should also be aware that if you are planning on mixing new tiles with old or reclaimed tiles, their guarantee may be compromised. Remember, it is impossible to know how much life a reclaimed tile has.

It is possible to source tiles to match originals by looking for a manufacturer mark on the back of the tile — often giving the design and age of the tile, making it easier to find reclaimed tiles from a roofing or salvage merchant. Be aware though that while reclaimed tiles have a weathered appearance, they may still not exactly match your originals if they have been positioned at a different orientation and have more or less moss growth.

New tiles can be made to look old using stains and sprays, but it is important to remember they will naturally weather over time. Applying a coating of a nutrient such as skimmed milk or yogurt, liquid tomato fertiliser or liquid cow manure can also help speed up the growth of moss and lichen to help the new tiles blend in with the old. It is also worth noting that when it comes to rooftiles, a slight difference between the new and old is far less noticeable than with bricks as they are viewed from further away.

Matching Stone

Stone extensions can be even harder to match to the existing property than brick. Being a natural product, stone obviously has variations in colour and tone, and if the building was built some time ago it will be very hard to achieve the same texture and weathered effect as the original. Unlike bricks, stone cannot be ‘manufactured’ to match the original, but there are a few ways to find a similar look.

  • Obviously using the same stone from the same quarry will be a good start, but even this does not guarantee a perfect match.
  • Ask your supplier to build a small sample wall to check how it will sit against the original.
  • You will also need to work with the stone mason to ensure the new surface texture of the stone will match — various techniques such as ‘chiselling’ and ‘axing’ all produce a different look.
  • You need to ensure the size and course height matches too.
  • Having the original stone cleaned back to its original colour will also help.

Finally, if you are still worried, it might be best to build something completely contrasting — stone buildings look great teamed with glass, render and timber cladding.

Read More