Conversions
Make sure you account for some of these renovation costs. When commencing a refurbishment project, most of us do our homework with regards to costs and budgeting. This article in Houzz by Victoria Harrison flags some “unexpected” costs that you probably haven’t added to your comprehensive spreadsheet. Download our FREE Project Management Checklist now to keep on top of your renovation.
If you’ve ever undertaken any renovation work, you’ll know most projects end up going over budget, however carefully you manage the job. Even with a sensible contingency fund, extra expenditure can creep in to disrupt even the best-laid plans.
But what exactly are these extras and how can you preempt them? Here are a few of the surprising hidden costs of renovation work for which you may want to budget.
Dehumidifiers or heaters
If you’re plastering a large area of wall or having a new screed floor poured, you’ll probably have to hire a dehumidifier or heater to remove the excess moisture in the air and help with the drying process.
These can be hired by the day, so, depending on the time of year you undertake the work and the drying speed of the plaster or screed, this cost can be anything from a couple of days hire to a few weeks, plus the electricity running cost.
It won’t be a huge amount, but it’s something that can get forgotten in the initial budget.
Refinishing internal carpentry
Another unexpected knock-on effect of replastering large areas or working with wet materials, where you raise the humidity levels throughout the house, can be that internal doors swell up and need to be rehung.
Factoring in a carpenter to refit or rehang internal doors or make small adjustments is another cost that may not be on your spreadsheet, but might be worth keeping in mind at the planning stage.
Your electricity bill
If you’re undertaking extensive renovation work for a period of months, you may need to budget for your electricity bill to rise during this time.
With power tools being plugged in and recharged constantly, and several trades working on the house at the same time, you’ll be drawing on your power supply much more than usual. It might seem like an incidental, but if you allow for this before you start, you won’t be caught out by it halfway through.
Rubbish disposal
You might have factored in a skip at the end of your project, but it’s a rare renovation that creates less waste than planned. Most projects result in large amounts of rubbish and this will need to be disposed of safely, which can add on extra pennies at the very end of your project when funds are low.
Skips aren’t cheap, so if you end up needing to hire more than one, it could add to your overspend. It’s best to consider this at the planning stage and budget for a larger skip than you think you need, or for someone to come and collect the rubbish at a couple of points during the project.
A deep clean
It’s incredible how far dust can travel when heavy renovation work or demolition is taking place elsewhere in the house. You can keep all the internal doors and windows closed, but more often than not you’ll find yourself shaking dust out of curtains and bedding in rooms away from where the work’s taking place.
If you’re living on site, you can keep on top of this on a daily basis while the project’s ongoing. However, you might want to factor in some budget for a deep clean of carpets and textiles at the very end of the job to return your house to normal once the builders have left.
Patching up paintwork
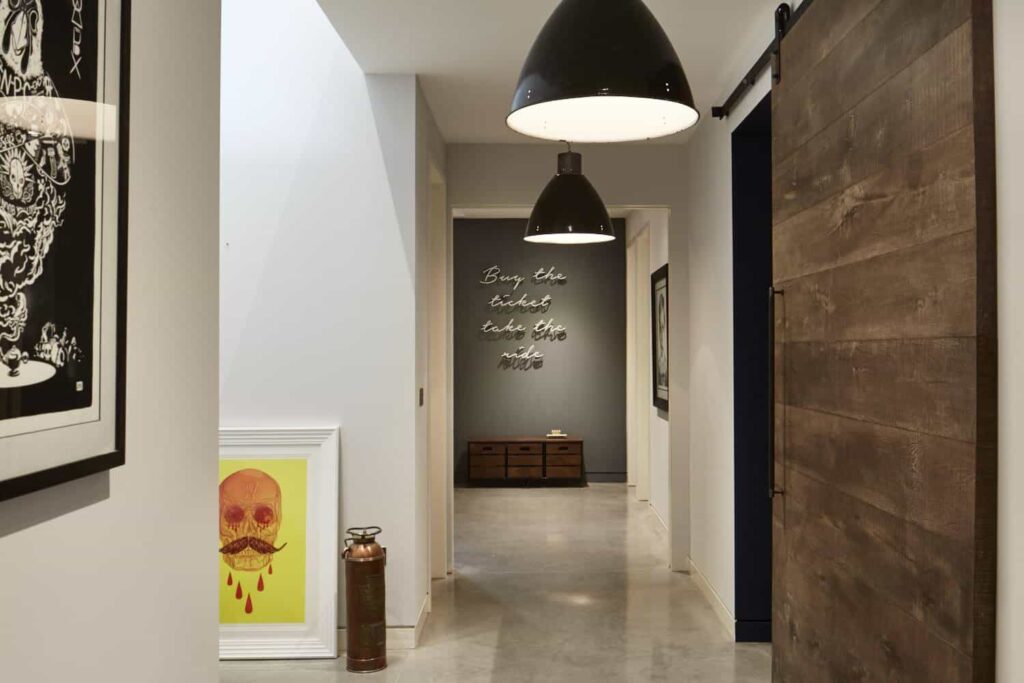
High-traffic areas, such as hallways, can take a bit of abuse during renovation work, with lots of people walking though each day and ladders and tools being carried in and out.
As such, you might need to set aside a bit of cash for redecoration once the work’s complete. Even if it’s just patching up small chips in woodwork and giving walls a fresh coat of paint, keep in mind you’ll need a little pot of money for this.
Replacement carpet in adjacent rooms
Carpet can sometimes be damaged in adjoining rooms to those where the work is taking place. If you’re moving internal walls around, carpet may have to be cut, for example, or if you have lots of people walking though a hallway to get to the room where work is being done, carpet can get damaged and need professionally cleaning or replacing.
Laying down carpet protector film can help, but dirt has a way of finding its way around even the best protection, so keep this in mind when budgeting for cleaning costs at the end of the work.
Garden reboot
Building work can have a big impact on adjoining outside areas, as skips, machinery and materials all have to go somewhere while work is ongoing. Footpaths and patio areas will have lots of extra footfall, too, so expect your garden to sustain a bit of damage.
Once the work is complete, you can take stock of the garden, but it’s worth keeping a bit of money aside in case you need to fix fencing, replace turf or replant some areas.
At SDA Build we try to list all known and potential costs in our schedule of works so our clients are not hit with unplanned costs to the best or our ability. Do give us a call on 0208 191 7595 to speak to us about your home renovation project. We’d be happy to visit your property and give you our thoughts and estimates on the cost of your project.
Read MoreIn the last year, we have worked on several Chelsea Construction projects in London. Chelsea and Kensington are areas that we particularly enjoy working in as the homes here have personalities of their own. Many of them are 3-4 storeys high and are characterised by high ceilings, large rooms and traditional features which need to be both preserved and modernised. There is therefore an increasing trend of installing contemporary conveniences such as underfloor heating, SMART systems, service elevators and air conditioning amongst others. In this article, we’d like to discuss the installation of home air-conditioning systems.
Summers in the UK are becoming increasingly warmer. There has been a noticeable rise in the number of “unbearably hot” days in the last 5-6 years. Whilst fans and portable cooling units have sufficed for most homes so far, the latest domestic air conditioning systems have made it possible to have your entire homes cooled through a central system.
No doubt, these systems are more expensive than traditional one-room units, but not only are they more aesthetically pleasing, but they will add value to your property.
Installed systems usually comprise an outdoor unit that has a fan in it. The fan is then connected to an indoor unit via two insulated pipes that contain refrigerant. (The pipes, including the insulation layer, are around 28mm diameter.) The indoor units are available in various configurations:
- The high wall unit is a bulk-head that is mounted on the wall and is about the size of a couple of shoe boxes
- Low wall units look like standard radiators
- Ceiling cassettes can be mounted in the ceiling in a central area of the room
- More discreet slim-ducted units can be positioned in the ceiling or housed in grilled boxes above cupboards or near doors, as is common practice in many hotels. The ducted units can also direct the air to more than one outlet through a number of ducts, with separate dampers in each duct for individual room control. These ducts must be insulated to avoid condensation.
It is usually the ducted system that is installed in the homes we work on in Chelsea. Ducted air conditioning is the most efficient cooling system for homes on the market today.
Ducted air conditioning works by funnelling cool air from a central unit (usually installed in your loft) through a series of ducts to every room in your home. The circulation of air is usually zoned, that allows you to control airflow, temperature and turning off any zones. This reduces the running cost and allows you to have the temperature of house where you are most comfortable.
Ideally, a ducted system should be installed when you are planning a complete home renovation or building a new home from a planning and layout perspective. However, it is just as possible to install these systems as a one-off project in your home.
If you are thinking about installing air-conditioning in your home, please do give us a call on 0208 191 7595. We’ll be happy to advise you on what would work best in your property. If you are planning a complete refurb, do consider booking a FREE consultation via our website. One of our team will visit your property, discuss your needs and share our suggestions and recommendations.
Read MoreIncreasingly, homeowners are ditching unsightly radiators and moving towards installing underfloor heating throughout their homes. Not only does this free up wall space, but heat distribution is more uniform and even. However, there's a lot to consider before installing it, especially if your home is not a new build. We sourced this informative article in Homebuilding & Renovating; "Underfloor Heating - A beginner's guide"
Underfloor heating is an increasingly popular choice for homeowners looking to extend or renovate existing properties, and for self builders looking to build their own homes.
However, getting your underfloor heating system right requires a joined-up approach and involves the homeowner making some key decisions.
There are two main types of underfloor heating:
- ‘warm water’ or wet underfloor heating (which we will focus on here)
- electric underfloor heating
What is Wet Underfloor Heating?
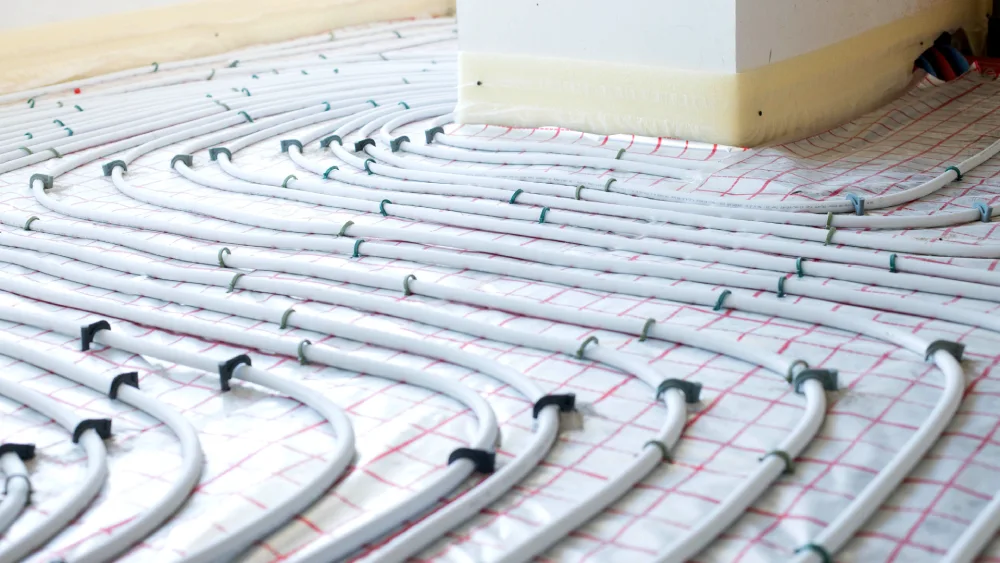
In basic terms, a wet underfloor heating system features pipes, filled by warm water and powered by a boiler or heat pump, concealed within the floor, and typically embedded within a screed.
In effect, the pipes mean the whole floor acts like a radiator, warming the room from the ground up.
A whole-house underfloor heating system will feature separate pipe runs to each room or ‘zone’. This provides the opportunity to control the temperature and timing of each zone to suit occupancy patterns. For example, the living room may need to be warm through the evening while bedrooms need to be heated later in the day.
The Benefits of Wet Underfloor Heating
There are a number of key benefits, including:
- Due to the floor’s large surface area, the heat provided only needs to be a couple of degrees warmer than room temperature — the result is a gentle heat which rises steadily upwards, with no cold spots or draughts, making for a comfortable environment
- Being ‘hidden’ within the floor, an underfloor heating system does not take up valuable wall space
- Underfloor heating operates at a much lower temperature than a radiator system (40°C compared to 65°C) and so requires less work from the boiler
- For the latter reason, underfloor heating works well with renewables, particularly ground source or air source heat pumps.
How Much Does it Cost?
Underfloor heating costs from around £20/m2 to £40/m2 installed. Factors such as the size of the property, the amount of heating the building needs and whether it is a new build, renovation or conversion, will impact on the cost.
UFH is more expensive to install than a comparable radiator system — it typically costs 20% to 50% more.
Choosing the Right Screed for Your Underfloor Heating
The thickness of the screed in which the warm wet pipes sit will have a dramatic impact on how the system is used.
A thick screed will give a longer reaction time (the time taken to warm up and cool down), while a thin screed will have a quicker reaction time.
- If the pipes are housed in the concrete floor slab (sometimes the case for new homes), this is could be 150mm thick and give a reaction time of over four hours. In this situation, it is best to run the system all day, at a lower room temperature — say 15°C or 16°C — to provide background heating to the whole house. Highlight heating, such as a woodburning stove, is a good idea in the rooms that are occupied)
- A standard sand and cement screed would typically be 65mm to 75mm thick and the UFH could take upwards of two hours to heat the room or cool down. This situation may be well-suited to rooms where we spend a lot of time, such as lounge or kitchen, but might be less acceptable in a guest bedroom
- With thinner flow screeds, we might expect a thickness of 35mm to 40mm and a reaction time of around 30 to 40 minutes — the system can be run in a similar way to a radiator system. Flow screeds offer better thermal conductivity than sand and cement, and being thinner and lighter means that they can be suitable for both renovations and new builds
Which is right and best will depend on the construction of the house, your occupation habits and how you intend to use the house.
Which Floor Covering Should I Choose?
- Tiles, stone or similar are generally accepted as the optimum covering. They absorb heat rather than insulate and allow that heat to radiate into the room, but they are not the only option.
- Timber flooring will tend to insulate and reduce efficiency, but thinner profile engineered timber has little noticeable impact on heat output. Solid timber is notoriously tricky with underfloor heating — it needs to be acclimatised for around a month. Ask your supplier for advice
- The Carpet Foundation carried out research in conjunction with the Underfloor Heating Manufacturers Association which shows that some carpets can be used with UFH. The research showed that a carpet and underlay with a thermal resistance of less than 2.5 togs does not have a significant impact on efficiency
Whatever floor covering is to be used, it is a good idea to tell the underfloor heating designer so that the pipe layout can be properly specified.
How to Control Underfloor Heating
Underfloor heating system controls feature two main parts:
- a digital zone control that will be used to determine the temperature of each room/area
- the manifolds and valves that the zone control operates
The zone control will be placed somewhere where the homeowner can make adjustments, while the manifolds will be placed out of the way – under the stairs or in a cupboard – so as to be unobtrusive.
There is no regular maintenance regime associated with underfloor heating, but if things do go wrong, it will typically be with the control systems rather than the system itself.
Underfloor Heating for Existing Homes
One of the key challenges when installing UFH in existing houses is the depth of the system. Once insulation, the screed and final floor covering have been installed, the floor height may have been raised by some 150-200mm.
There are low-profile systems, developed specifically for that situation, that can be installed directly onto existing floors that offer significant savings in retrofit situations. Nu-Heat’s LoPro system, for example, was developed for this situation.
Nu-Heat’s LoProTM10 is an underfloor heating solution for retrofit purposes with a total build-up of just 15mm.
Low-profile systems tend to have smaller diameter pipes and run at a higher temperature. The impact of this is that the floor will heat up and cool down far more quickly than conventional UFH.
Where UFH is added to an existing radiator system then a different control system will be needed. Luckily wireless thermostats (some of which can be controlled with a phone app) make installation far easier.
Retrofit underfloor heating system will always be a bit more expensive to install, but the cost could be a lot higher if existing timber floors need to be taken up or concrete floors excavated.
What to Consider Before Installing Underfloor Heating
Ultimately, the efficiency and success of an underfloor heating system will depend on the quality and design.Therefore, choosing a supplier who offers a good design service and aftercare is important. A specialist underfloor heating company is often best placed to achieve this.
If the design is wrong it is unlikely that the homeowner will know until they have lived in the house for a whole heating season — by which time it’s probably too late.
Finally, if you are choosing to pair underfloor heating with a heat pumps it is a good idea to choose one supply and install company. Both are complex systems and getting the whole heating system to work in perfect harmony can be tricky.
Is it Worth Installing Underfloor Heating?
Radiators have served us well for many years: they are cheaper to buy; they are well understood and there is a huge choice when it comes to size, style and installers. But they are less efficient and take up floor space. Perhaps the biggest problem is that in larger rooms they can produce a temperature difference of up to 4°C across the room.
People want more energy-efficient houses and a system that gives a 15% reduction in energy demand (compared to a radiator system) cannot be ignored. And that is to say nothing of the greater comfort and the increased floor space that it brings.
What is Electric Underfloor Heating?
Electric underfloor heating is often cheaper and easier (particularly in existing homes) to install than wet UFH. However, the running costs can be three times higher.
It is often a good idea to install electric underfloor heating in a small, single area like a bathroom or en suite, where it may be difficult to install wet underfloor heating.
One of the most common – and worst – uses is in a conservatory. Typically these areas need a lot of heat and are used for relatively long periods of the day (compared to a bathroom).
Then running cost becomes the key issue and the extra trouble and expense of a wet system is well worthwhile.
Many of our clients, especially in the Chelsea and Kensington areas of London are moving from traditional radiators to underfloor heating. Do give us a call on 0208 191 7595 if it's something you are considering. We can advise you on the best way forward. If you prefer, you can book a free consultation via our website, where a member of our team will visit your property, discuss your needs and share our recommendations with absolutely no obligation.
We are delighted to share that SDA Build London has won the Global Business Insight Award form Most Outstanding Property Refurbishment Firm 2019.
This is a an honour for the entire SDA team who have worked tirelessly to ensure that our clients receive the highest standards of service from us.
A special thank you to all the team members for their hard work and commitment.
Read MoreAs builders, we are often confronted with the trials of obtaining planning permission, especially if you are in a conservation area. But you might be surprised to know that there are plenty of renovation projects that DON’T need planning permission. We found this comprehensive list on the HomeBuilding & Renovating site.
Do bear in mind, however, that there are several caveats and conditions your plans have to meet in order to avoid the planning permission process, so play close attention to the conditions. Better still, involve an experienced architect to find out exactly what you need to do.
Did you know that not all home improvement projects require planning permission? Here are 20 things you can do under Permitted Development.
When it comes to large and substantial home improvement projects it is more than likely that you will need planning permission from your local authority before starting the work. But there are a number of smaller, (effectively pre-approved) improvements that you can make under what is know as your Permitted Development Rights.
What is Permitted Development?
Permitted Development (PD) Rights give implied planning consent for a number of smaller home improvements (we’ve listed 20 of them below). While there are many projects you can undertake within PD, there are limitations (especially if you have already made many improvements to your home, or if you live in a designated area or a listed building).
1. Interior Remodel
Remodelling the interior is a great way to add more space to your home and can often be done within PD, especially if your proposed work does not require you to extend the overall footprint of the dwelling.
While you won’t need planning permission, you will need Building Regulations approval on structural elements and electrical works.
2. Moving or Adding Windows & Doors
In normal circumstances, you can replace or add new windows in the original walls of your house without needing to secure planning approval. (However, you may need planning permission if conditions were attached to the original permission). As long as your building isn’t listed, you should be able to install double glazing under PD, but do remember that for new or bigger windows or doors, you will need to follow Building Regulations guidance.
Bear in mind that bay windows are classed as extensions. Planning permission to insert a new window or door opening is not required as long as any upper floor windows on the side elevation are glazed with obscured glass (level 4 or 5 obscurity). They must also be fixed into a non-opening frame (unless the opener is more than 1.7m above the floor of the room in which the window is installed).
3. Converting Attached Buildings, e.g. Garages
Converting an attached building, like an integral garage, into living space also falls under PD as you are not increasing the overall footprint of the building.
4. Adding a Single-Storey Extension
As long as you stay within the below parameters, you can build a single-storey extension without needing planning permission:
- The extension does not sit forward of the principal elevation
- Materials should be similar
- Where it is within 2m of any boundary, the eaves cannot be higher than 3m, and no more than 4m in height otherwise
- Rear extensions — no more than 4m in depth (detached house) or 3m in depth (semi-detached or terrace)
- Side extensions — the width of the extension must not be greater than half the width of the original dwelling. Side extensions are not permitted on Article 1(5) Land (e.g. AONB, Conservation Areas).
5. Adding Rooflights
Under PD you can make alterations to the roof of a dwelling, like the introduction of rooflights (as long as they do not project more than 15cm from the roof slope). If, however, the rooflights would extend forward of the roof plane on the elevation fronting a highway then they are not permitted under PD.
It is worth noting that rooflights are not permitted on a dwelling which is located in an Article 4 Direction Area. Two common examples are a Conservation Area or an Area of Outstanding Natural Beauty.
6. Converting a Loft
Additional space can also be achieved through a loft conversion, without the need for planning consent. While there are limitations on the cubic content allowed under PD, generally, up to 40m³ is fine.
When it comes to additional headroom in the loft space, PD allows for the construction of dormer windows. But, they must not sit higher than the highest part of the existing roof, or extend forward of the roof plane on the principal elevation.
7. Adding a Two-storey Extension
You can add a two storey extension to your home under PD providing it is at the rear of the dwelling (this includes adding a second storey onto an existing single storey part of the house). In addition, your two storey extension must not exceed 3m in depth or be within 7m of the rear boundary. Specific restrictions also apply to the glazed nature of windows in such extensions.
8. Adding a Conservatory or Orangery
Similar to single storey extensions, conservatories and orangeries fall under the same restrictions and can be added under PD. Check the rules about single storey extensions above.
9. Adding a Shed or Outbuilding
Where you have a larger plot, there may be opportunities to build multiple outbuildings under PD, providing the total area covered by such buildings/enclosures does not exceed 50% of the total area of the curtilage. This 50% should take into account any extensions, but not the area covered by the main house.
Outbuildings cannot sit forward of the principal elevation, and there are height restrictions depending on the type of roof (4m for dual pitch roofs, 3m for other roofs, and 2.5m when the building is within 2m of the boundary). Outbuildings may only be single storey, with the maximum eaves height remaining at 2.5m.
A key factor to bear in mind when considering what you want to achieve from an outbuilding is that the use should be ‘incidental’ to that of the dwelling, e.g. gym, garage, store. Outbuildings under PD cannot be used for residential accommodation, e.g. bedrooms, but can be used to provide a place to work from home.
10. Converting Two Homes into One
Converting a pair of semis or two flats, into one property can usually be done under PD and can be a great way of generating extra space without having to move. Unfortunately, the same rules do not apply if you are dividing a single property into two dwellings. For this you would need to apply for planning permission.
11. Adding a Porch
You can build a porch on the front of your property without planning permission, as long as you follow certain rules:
- No part of the porch can be taller than 3m
- It cannot be within 2m of any boundary adjacent to a highway
- The ground area (measured externally) does not exceed 3m².
12. Adding Gates, Walls and Fences
Permitted Development facilitates the erection, construction, maintenance, improvement or alteration to a gate, fence, wall or other means of enclosure, providing such work stays within the following limitations:
- The height would not exceed 1m when adjacent to a highway
- The height would not exceed 2m for any other gate, fence etc
- Such development is not permitted under PD around a listed building
13. Garden Decking
As long as the height falls below 300mm, garden decking and other similar structures can be built without planning permission, as long as certain criteria are met (available at planningportal.co.uk).
14. Building a Swimming Pool
Under Permitted Development rights you can build a swimming pool within your garden, provided that the total area covered by the pool does not exceed 50% of the area of the garden curtilage.
15. Creating New Access
Creating a new vehicular access onto an unclassified road can be done under your PD rights, but you will need planning permission to create accesses onto classified roads.
For a new access onto a classified road, you will need to ensure sufficient visibility when leaving the site, as well as enough turning space to allow you to enter and exit in a forward gear.
16. Changing/Adding Cladding
Cladding (stone, pebble dash, render, timber, etc.) changes may fall under PD, but is not permitted under PD on any dwelling house located on Article 1(5) land (in special areas, e.g. an AONB).
17. Adding Solar Panels
Solar panels can be added under PD, providing they do not protrude more than 200mm beyond the plane of the wall or roof, and that the highest part of the panel is not higher than the highest part of the roof (excluding the chimney).Free-standing panels can also be developed, but are limited in size and proximity to the boundary.
Limitations will apply in Conservation Areas and on listed buildings.
18. Adding a Basement
In a recent appeal decision, it was considered that basements could be PD under Class A of the General Permitted Development Order (GPDO). However, bear in mind that PD does not allow for engineering works.
19. Adding/Creating Parking Spaces
Class F of the GPDO refers to the provision of hard surfaces, such as parking areas. These are also permitted under PD providing that any hard surface situated between the principal elevation of a dwelling and the highway, or any surface which would exceed 5m², is made of porous materials, or provision is made to direct run-off water from the surface into a permeable/porous area within the property curtilage… not onto the highway!
20. Converting Industrial/Commercial Buildings
It is possible to convert an industrial, commercial or agricultural building for residential use, without the need for planning permission. As is often the case, you will require approval for Listed Buildings and in Conservation Areas. You will also need to follow the Prior Notification procedure if you are converting an agricultural building such as a barn.
Read More